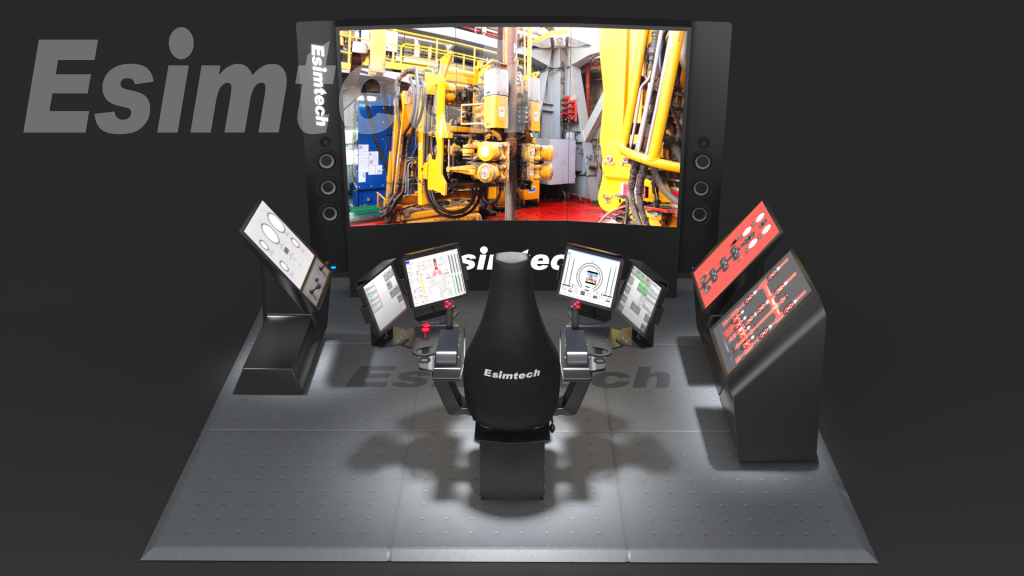
The oil and gas industry's drilling operations are intricate, involving a complex array of equipment and procedures. Despite rigorous protocols, emergencies can still occur, posing serious risks to personnel, the environment, and equipment. The drilling emergency practice training platform is a tailored training system designed for the oil and gas industry. This innovative drilling practice training simulator replicates diverse drilling scenarios, enabling personnel to practice emergency response strategies in a secure and controlled environment, thereby enhancing their skills and comprehension of emergency protocols.
The Vital Necessity of the Drilling Emergency Practice Training Platform
Safety: Drilling operations harbor inherent hazards, and emergencies can materialize unexpectedly. Comprehensive training in emergency response protocols reduces the likelihood of injuries or fatalities.
Preparedness: Equipping workers with rapid and efficient response capabilities limits losses and minimizes the impact of emergencies.
Compliance: Regulatory bodies mandate proper emergency response training. Adhering to these standards is pivotal for personnel and environmental safety and to avoid penalties and legal ramifications.
Efficiency: Effective emergency response necessitates a well-coordinated effort. Adequate training streamlines collaboration, minimizing response time and operational disruptions.
Reputation: Oil and gas emergencies can tarnish a company's public image. Competent emergency response mitigates negative publicity and maintains public trust.
Components of the Drilling Emergency Practice Training PlatformThe platform encompasses computer systems, software, physical models, and monitoring systems.
Software simulates drilling issues like blowouts and stuck pipelines.
Physical models replicate drilling equipment and components.
Monitoring and control systems ensure training safety.
Various control methods and training modalities are available.
Training Modules and Exercises

Blowout Control Exercise: Teaches blowout control measures and well-kill procedures.
Stuck Pipe Exercise: Instructs pipe-freeing techniques.
Well Control Exercise: Covers pressure control procedures.
Equipment Malfunction Exercise: Focuses on troubleshooting and repair skills.
Emergency Response Exercise: Imparts emergency response methods and basic first aid.
Team-Based Exercise: Enhances communication, teamwork, and decision-making.
Advantages of the Drilling Emergency Practice Training Platform
Improved Safety: Provides a secure environment for practicing response tactics, mitigating real-life risks.
Enhanced Preparedness: Enables quick and efficient responses to actual emergencies, minimizing potential damage.
Cost Savings: Offers a cost-effective alternative to on-site training, saving resources and reducing operational interruptions.
Customization: Tailored to simulate distinct drilling scenarios, promoting hands-on experience in diverse situations.
Real-Time Feedback: Enables self-assessment and skill refinement.
Regulatory Compliance: Meets training requirements while ensuring preparedness for crises.
In Conclusion
The drilling emergency practice training platform is pivotal for honing the skills and knowledge of oil and gas professionals. By replicating practice crises within a controlled environment, personnel can enhance their readiness and response techniques, reducing the risk of harm, loss, and damage. In an industry where safety and efficiency are paramount, this platform serves as an essential tool for safeguarding personnel, the environment, and the industry's reputation.
Freeze-drying technology has gained widespread prominence across various industies, including medicine, biology, food production, active substances, and nanomaterials. Laboratory freeze dryers have become indispensable tools in research and development, testing applications, and experimental scientific inquiries. These freeze dryers are extensively employed in diverse industries, ranging from bio-cosmetics and pharmaceuticals to food and nanomaterials, enabling the preservation of biological activity and substance structure. This article delves into the fundamental principles of freeze drying, its applications, and the key features of laboratory freeze dryers.

Freeze Drying: Preserving Items through Sublimation
Freeze drying, also known as sublimation drying, involves the removal of moisture from items to prevent deterioration. The deterioration of items results primarily from external and internal factors such as air, water, temperature, and biological processes. By minimizing the impact of these factors, the aim is to maintain items' integrity over a specific period.
To facilitate extended storage, moisture, a vital component for the growth of living organisms, needs to be eliminated from the items. Reducing the water content hinders the growth and reproduction of organisms, thereby preserving them. Additionally, water can catalyze chemical reactions leading to item deterioration.
Characteristics of Laboratory Freeze Dryers
Laboratory freeze dryers are available in various configurations, each tailored to specific needs:
Ordinary Type: Suitable for a wide range of materials, items are placed directly on the material tray for freeze drying.
Gland Type: Designed for drying materials in vials, it ensures a vacuum-sealed environment post-drying.
Multi-Manifold Type: When multiple materials must be dried separately, this type prevents interference and enables easy observation and sampling.
Multi-Manifold Gland Type: This type accommodates diverse materials, some processed in vials, while others undergo different treatment methods.
Small In-Situ Pre-Freeze Type: It offers easy-to-use features such as one-button start, adjustable temperature, program operation, and automatic control, suitable for in-situ pre-freeze drying.
Preparation and Maintenance
Before using a freeze dryer, several crucial steps must be taken:
Verify the power supply voltage is correct.
Ensure accurate placement of the temperature measurement camera in the drying chamber.
Check vacuum pump oil quality and quantity.
Inspect gate valves in the ultrafiltration device for correct functionality.
Confirm clean drainage of defrosting water from the cold trap.
For maintaining a laboratory freeze dryer:

Strict adherence to usage and maintenance guidelines is vital.
Regular checks and replacements of lubricating grease are essential, influenced by compression end temperatures.
Lubricating oil should be inspected every 10,000 hours of continuous operation.
During maintenance, clean the refrigeration system if the motor burns out to prevent impurity dispersion.
System-wide inspections should include the filtration system, and components should be replaced if necessary.
After compressor overhauls, dehumidify the system using dry nitrogen and vacuum treatment to enhance operational efficiency.
System leaks are common sources of refrigeration system failures; prioritize leak testing and pressure maintenance.
In case of equipment failure, a thorough investigation is necessary, and professional assistance should be sought if needed. Neglecting proper maintenance may lead to detrimental long-term effects on compressor operation and system efficiency, underscoring the importance of vigilant care.
Conclusion
Laboratory freeze dryers are pivotal tools in various scientific and industrial applications, aiding in the preservation of biological activity and structural integrity. Understanding the principles, characteristics, and proper maintenance practices of lab freeze dryers ensures efficient and effective freeze-drying processes for a diverse array of materials.
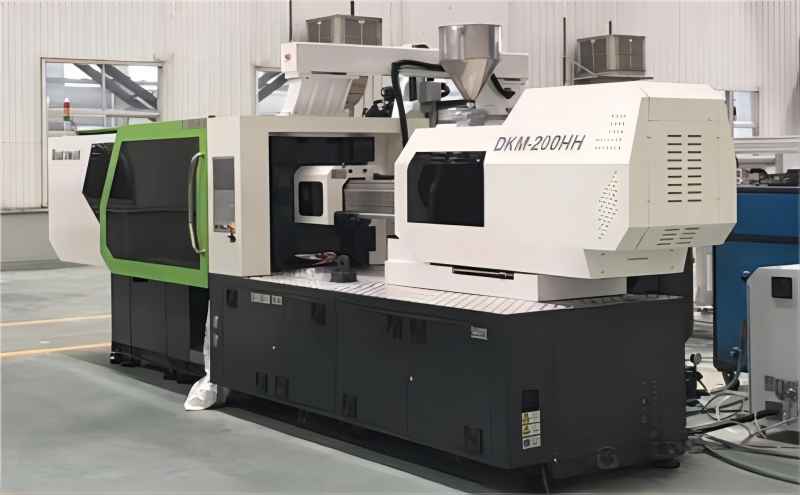
Injection molding is a transformative process that shapes molten raw materials into semi-finished products with specific shapes through a sequence of operations including pressurization, injection, cooling, separation, and more. To delve into the intricacies of injection molding, we break down each stage of the process in detail.

The Sequential Stages of Injection Molding
The injection molding process unfolds through six distinct stages, namely mold closing, filling, pressure maintenance, cooling, mold opening, and demolding. These stages form a cohesive and continuous workflow, with particular emphasis on filling, pressure maintenance, cooling, and demolding for their pivotal roles in shaping the final product.
Focusing on the Filling Phase
Filling initiates the injection molding cycle, commencing from mold closure until the mold cavity is approximately 95% filled. This phase is greatly influenced by filling speeds, resulting in two key modes:
High-Speed Filling: Characterized by higher shear rates, lower viscosity, and diminished flow resistance, high-speed filling generates thinner curing layers due to localized viscous heating effects.
Low-Speed Filling: Operating at a lower shear rate and higher local viscosity, low-speed filling exhibits substantial flow resistance. The slow replenishment rate and thermoplastic flow facilitate efficient heat conduction, with minimal viscous heating, yielding thicker curing layers.

Understanding Pressure Maintenance
Pressure maintenance sustains continuous pressure application, compacting the melt and elevating plastic density to counteract shrinkage. This stage spans from mold cavity filling to gate curing sealing, and features distinct attributes:
Elevated Back Pressure: The mold cavity is filled with plastic, resulting in high back pressure. The injection molding machine's screw movement is limited as pressure compacts the material.
Accelerated Cooling and Solidification: As cooling progresses, plastic solidification accelerates due to mold wall contact. The melt's viscosity rises, amplifying resistance within the mold cavity. Pressure peaks upon gate solidification and sealing.
Differential Density Distribution: High-pressure zones yield dense plastic, while low-pressure regions result in looser and less dense material. Density distribution evolves over time and location.
Negligible Flow: Flow rate drastically diminishes during pressure maintenance, with pressure superseding flow as the primary influencer.
Mold Swelling: Pressure's upward force can expand the mold cavity. While advantageous for venting, excessive expansion may lead to defects if not controlled through appropriate clamping force.
Unveiling the Cooling Process
A meticulously designed cooling system is paramount in injection molding. Cooling time occupies around 70% to 80% of the entire molding cycle, making an efficient system integral for accelerated production, cost reduction, and product quality assurance.
Key Cooling Rate Influences:
Product Design: Greater wall thickness extends cooling time.
Mold Material: Higher thermal conductivity expedites heat transfer and reduces cooling time.
Cooling Pipe Configuration: Larger diameter and quantity of cooling pipes near the mold cavity enhance cooling efficiency.
Coolant Flow and Properties: Enhanced flow and favorable viscosity and heat transfer coefficients bolster heat removal.
Plastic Selection: Thermally conductive plastics with low specific heat enable swift temperature changes, facilitating heat dissipation.
Finalizing with Demolding
Demolding, the ultimate step in the injection molding cycle, significantly impacts product quality despite the product's cold fix. Mold design should select an appropriate demolding method based on the product's structural characteristics.
In Conclusion
Injection molding's intricate process comprises various stages, each with unique attributes and influences. Mastering the mold closing, filling, pressure maintenance, cooling, mold opening, and demolding stages equips manufacturers with the prowess to create superior products, maximize efficiency, and elevate their injection molding endeavors.
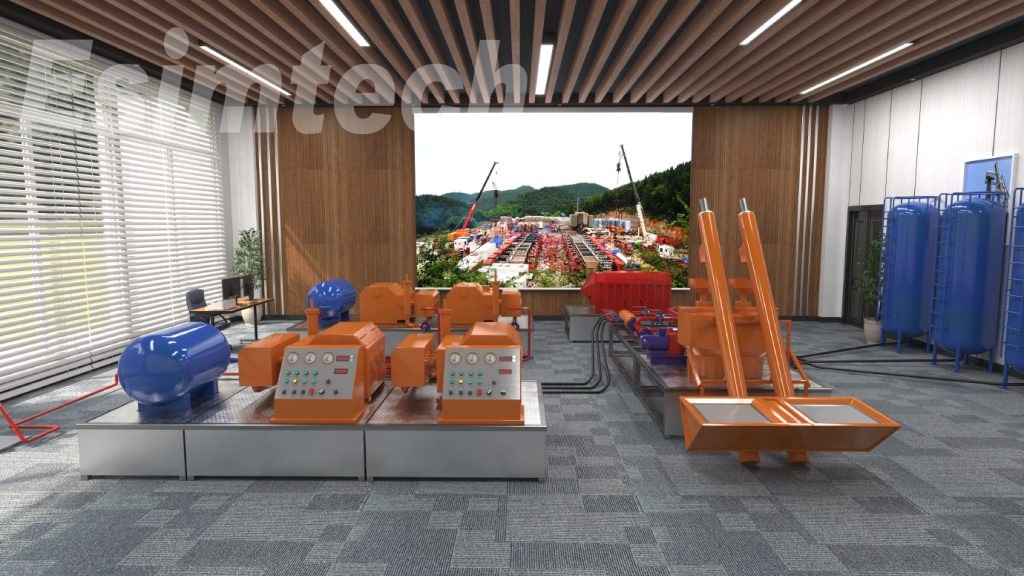
In the dynamic realm of oil and gas, ongoing technical breakthroughs have ushered in a new era of exploration and extraction methods. This transformation is most evident in the evolution of reservoir stimulation strategies, now empowered by fracturing and acidizing simulators. These cutting-edge tools have redefined how oil and gas company approach reservoir enhancement, ushering in a paradigm where output maximization, cost reduction, and environmental preservation converge. This article delves into the intricacies of fracturing and acidizing simulators, exploring their functionalities, significance, and the advantages they offer.
Understanding Fracturing and Acidizing Simulators
Two pivotal techniques, fracturing and acidizing, play a vital role in stimulating oil and gas reservoirs. Acidizing employs chemical treatments to dissolve formation components, thereby boosting permeability. On the other hand, fracturing revolves around generating fractures in rock formations, thereby enhancing the flow of hydrocarbons. These methods have proven indispensable in extracting previously untapped resources and optimizing yield from pre-drilled wells.
The Relevance of Fracturing and Acidizing Simulators in the Industry
Enhanced Production Optimization: These simulators empower engineers to predict reservoir behavior accurately, enabling them to devise stimulation treatments tailored to these predictions. This precision-driven approach leads to increased production rates and heightened reservoir performance.
Cost-Efficient Operations: The oil and gas sector demands substantial capital investments. By using fracturing and acidizing simulators, companies reap benefits like resource efficiency, reduced reliance on trial-and-error, and avoidance of costly errors. Simulators curtail expenses by streamlining operations, modeling diverse scenarios, and evaluating the effectiveness of stimulation strategies.
Elevated Reservoir Management: Simulators provide comprehensive insights into reservoir behavior and performance. By factoring in variables such as fluid properties, rock mechanics, and wellbore configurations, engineers can optimize stimulation designs. This results in enhanced production predictions, refined recovery techniques, and efficient well spacing, all contributing to superior reservoir management.
Environmental Impact Evaluation: The environmental repercussions of fracturing and acidizing processes can be detrimental if not managed effectively. Simulators play a pivotal role in assessing potential environmental effects by accurately predicting fluid behavior, fracture propagation, and migration concerns. This enables operators to execute stimulation procedures that minimize environmental risks and conserve natural resources.
Risk Mitigation and Safety Enhancement: Inherent risks in fracturing and acidizing operations include fluid migration, wellbore integrity, and equipment failures. Simulators mitigate these risks by simulating various scenarios and assessing potential consequences. This insight allows operators to implement safety measures and optimize operational protocols, ensuring secure and dependable operations.
Technological Advancements: With the advancement of computer power and data analytics, simulators for fracturing and acidizing are evolving. By integrating real-time data with artificial intelligence and machine learning algorithms, these simulators enhance precision, effectiveness, and predictive capabilities. Operators now have the opportunity to harness cutting-edge technology and foster innovation in reservoir stimulation methods.

Unveiling the Mechanism of Fracturing and Acidizing Simulators
These computer-based models emulate fluid flow, rock mechanics, and chemical processes within reservoirs. Considering variables like wellbore configurations, fluid properties, reservoir characteristics, and treatment strategies, simulators generate forecasts of reservoir performance, encompassing fracture propagation, proppant placement, and fluid distribution.
A Glimpse into Future Developments
The trajectory of simulators for fracturing and acidizing continues to evolve as computational prowess and data analytics advance. By merging real-time data with AI and machine learning, these simulators heighten precision, effectiveness, and predictability. This technological convergence empowers operators to leverage innovative methods for reservoir stimulation.
In Conclusion
Fracturing and acidizing simulators have catalyzed a profound shift in the oil and gas industry, ushering in an era of optimized reservoir stimulation. These simulators, underpinned by their ability to accurately forecast reservoir behavior, are integral to enhancing design optimization, cost containment, and environmental sustainability. They empower operators and engineers to make data-informed decisions, ultimately leading to the efficient and sustainable extraction of oil and gas resources.
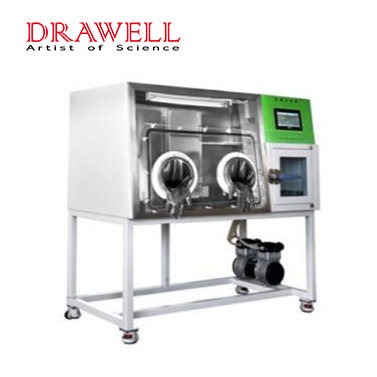
The anaerobic incubator represents a specialized apparatus designed to foster and manipulate bacteria within an oxygen-free environment. Its functionality extends to nurturing even the most demanding anaerobic organisms while circumventing the peril of their exposure to oxygen in an atmospheric setting. As such, this device stands as an ideal instrument for both anaerobic biological assessments and scientific investigations. Moreover, its versatility shines through as it accommodates various operational modes, effectively providing optimal conditions for the proliferation of microaerophilic bacteria. In this article, we delve into the essential considerations for installing and using anaerobic incubators.

Prerequisites for Anaerobic Incubator Installation
Ensuring the proper installation of an anaerobic incubator involves adhering to three key guidelines:
Optimal Placement: The unit should be positioned in an area characterized by minimal temperature fluctuations, enabling efficient operation. Shield it from direct sunlight and distance it from heat-emitting equipment. Stability in placement is paramount.
Secure Gas Cylinder Positioning: The mixed gas and nitrogen cylinders must be securely positioned, each equipped with a pressure-reducing valve (inclusive of a pressure gauge) and placed suitably.
Air Circuit Connection and Assessment: Thoroughly connect the air circuit while rigorously inspecting for potential air leaks. Employ sealant where necessary to prevent leakage at connecting points.
Guidelines for the Prudent Use of Anaerobic Incubators
The judicious operation of an anaerobic incubator necessitates adherence to the following eleven precautions:
Optimal Operating Environment: Ideally, set up the instrument in an environment characterized by clean air and minimal temperature fluctuations.
Comprehensive Familiarization: Prior to commencing operations, ensure a thorough understanding of the operational instructions for each component of the auxiliary instruments and gauges, grasping the correct utilization methods.
Culturing within Anaerobic Conditions: Only introduce cultures into the operational chamber after the prescribed anaerobic environment has been established.
Avoid Overcrowding: Refrain from overloading the chamber with items, as this may compromise temperature uniformity. Prevent obstructions of the circulating fan and air duct.
Safeguarding Anaerobic State: In the event of a malfunction (such as gas interruption), the anaerobic conditions can be maintained within the operational chamber for up to 10 to 12 hours. Should the duration exceed this window, consider alternate treatments for the culture.
Vigilance Against Air Leaks: Regularly monitor the gas pathway for any indications of air leakage.
Gas Cylinder Replacement: During gas cylinder replacement, exercise caution to securely fasten the tubing to prevent the inflow of oxygen-rich gases.
Adhering to Vacuum Pump Usage: Utilize the vacuum pump as directed and routinely inspect and replenish the oil.
Cautious Item Placement: Prohibit the placement of flammable, explosive, or corrosive items within the chamber. Ensure a cooling buffer zone outside the incubator to preserve its cooling efficiency.
Proper Shutdown Protocol: Upon discontinuing use, power down the anaerobic incubator by deactivating the main power button and the rear equipment switch.
Thorough Drying of the Chamber: Before storage, dry the interior of the chamber using the following method: Set the incubator temperature above 40°C, allow it to run steadily for two hours, open the chamber door for 10 minutes every half hour, and then repeat this process 3-5 times.
In summary, this article has provided a comprehensive overview of the imperative guidelines for the installation and operation of anaerobic incubators. For additional insights into anaerobic incubator precautions, consider reaching out to the manufacturer. Their specialized advice can prove invaluable when troubleshooting issues with your anaerobic incubator, ensuring optimal performance and results.