The oil and gas industry utilizes various drilling techniques, each suited for specific conditions, resource locations, and operational objectives. A comparative analysis of drilling methods highlights the advantages, limitations, and ideal applications of each. Understanding these methods can help stakeholders select the most appropriate approach based on factors such as efficiency, cost, safety, and environmental considerations.
1. Conventional Vertical Drilling
Overview:
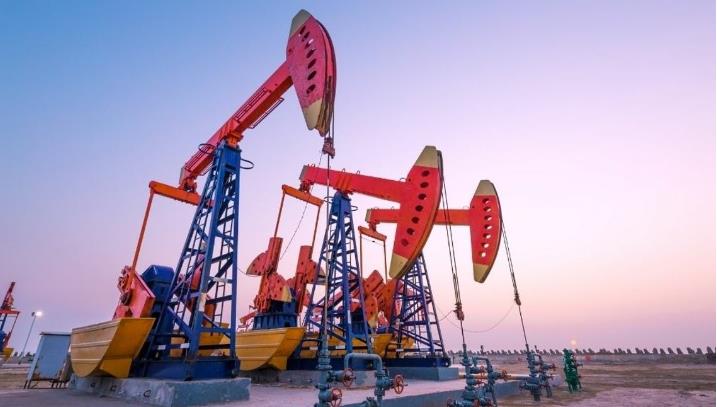
Conventional vertical drilling is the traditional approach, where the well is drilled straight down from the surface to reach an oil or gas reservoir. This method is straightforward, cost-effective, and widely used in regions where reservoirs are directly below the drilling site.
Advantages:
Lower Cost: Vertical drilling is often less expensive due to its simplicity, lower equipment requirements, and reduced complexity.
Simplicity and Speed: Fewer moving parts and shorter drill paths allow for faster drilling and completion.
Ease of Maintenance: Equipment and well maintenance are generally less complex, making it a preferred option in remote areas.
Limitations:
Limited Reservoir Access: Vertical wells are effective only in reservoirs that lie directly beneath the drill site, making them unsuitable for larger or unconventional reservoirs.
Lower Recovery Rates: Compared to advanced methods, vertical wells typically access less of the reservoir, resulting in potentially lower yields.
Environmental Impact: Multiple vertical wells are often required to cover an area, increasing land disturbance.
Ideal Applications:
Shallow or directly accessible reservoirs, smaller oil fields, and wells with low environmental restrictions are ideal for vertical drilling.
2. Directional Drilling
Overview:
Directional drilling enables operators to drill at various angles, allowing for multiple well paths to diverge from a single drill site. This approach is widely adopted for accessing resources spread across a broader area or where geological formations make vertical access impractical.
Advantages:
Increased Reservoir Contact: By adjusting the angle, operators can target multiple points within a reservoir, significantly increasing recovery rates.
Environmental Benefits: A single well pad can support multiple deviated wells, minimizing the environmental footprint.
Cost-Effective Multi-Well Pads: Drilling multiple wells from one location reduces costs associated with site preparation and surface equipment.
Limitations:
Higher Initial Costs: The equipment and technology for directional drilling are more costly than conventional vertical drilling.
Complex Operations: The additional engineering and planning required increase operational complexity and demand skilled personnel.
Ideal Applications:
Directional drilling is ideal for offshore and onshore reservoirs where the resource extends horizontally or where regulatory and environmental considerations limit the number of well pads.
3. Horizontal Drilling
Overview:
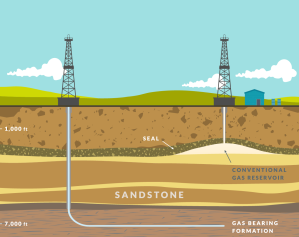
Horizontal drilling is an extension of directional drilling where the well is first drilled vertically and then gradually turned horizontally to maximize contact with the oil or gas reservoir. Horizontal wells are critical in the development of unconventional resources, such as shale and tight gas formations.
Advantages:
Enhanced Resource Recovery: Horizontal wells maximize reservoir exposure, significantly increasing production, especially in low-permeability reservoirs.
Efficient Resource Drainage: Horizontal wells can effectively drain large areas of a reservoir, reducing the need for multiple wells.
Compatibility with Hydraulic Fracturing: Horizontal drilling works well in conjunction with hydraulic fracturing to release resources in tight formations.
Limitations:
Higher Drilling Costs: Horizontal drilling requires advanced equipment and specialized techniques, increasing initial expenses.
Complex Well Design: Complex engineering and planning are required, as well as experienced drillers, which may limit its applicability in certain regions.
Ideal Applications:
Horizontal drilling is particularly suited to unconventional plays, including shale gas, shale oil, and coalbed methane, where maximizing contact with the resource layer is essential for economic viability.
4. Rotary Steerable Drilling (RSS)
Overview:
Rotary steerable drilling systems allow for precise steering of the drill bit without interrupting the drilling process. Unlike traditional steerable systems, RSS maintains continuous rotation of the drill string, improving drilling efficiency and allowing for highly accurate well placement.Advantages:
Enhanced Accuracy and Control: RSS provides real-time directional adjustments, which are essential for complex or extended-reach wells.
Improved Drilling Speed: Continuous rotation prevents the need to stop and adjust, leading to faster drilling and lower costs.
Ideal for Extended-Reach Drilling (ERD): RSS technology makes it feasible to drill longer wells with fewer deviations, maximizing reservoir exposure.
Limitations:
High Equipment and Operational Costs: RSS systems are among the most expensive due to the technology and real-time monitoring required.
Requirement for Skilled Operators: Operating RSS requires specialized skills and training, which can limit its application where such personnel are unavailable.
Ideal Applications:
RSS is ideal for deepwater offshore drilling, extended-reach drilling, and wells with complex geological formations, where precision and control are crucial.
Technological Advancements in Drilling Methods
The drilling industry is experiencing transformative changes with advancements in technology, making drilling safer, more efficient, and capable of reaching previously inaccessible resources. Here’s a look at some of the front-line innovations:
Automation and Robotics
Automation and robotics are replacing labor-intensive tasks in drilling, enhancing both safety and efficiency. Robotic arms can perform precise tasks at the borehole without fatigue, reducing human error and allowing for continuous operation. Think of it as having a tireless assistant performing delicate maneuvers in high-risk environments, ensuring reliability and reducing downtime.
Data Analytics and Real-Time Monitoring
Real-time data analytics and monitoring systems are revolutionizing the decision-making process. Sensors and advanced software continuously track the health and stability of the wellbore, acting as a vigilant, subterranean doctor that instantly identifies issues and recommends adjustments. This data-driven approach minimizes costly mistakes, increases efficiency, and helps operators maintain optimal drilling conditions at all times.
Advanced Drilling Fluids
Nano-engineered drilling fluids are redefining wellbore stability, cooling, and lubrication capabilities. These high-performance fluids are designed to perform under extreme conditions, enabling access to deeper and more challenging formations. Imagine these fluids as a “magic potion” that boosts drilling efficiency, stability, and safety in some of the harshest environments.
Artificial Intelligence (AI)
AI algorithms are making drilling operations smarter by predicting potential issues, recommending ideal techniques, and autonomously adjusting drilling parameters for optimal performance. Picture a drilling mastermind that anticipates and solves problems before they arise, ensuring safer and more efficient operations by continuously learning from past data to improve future outcomes.
Drilling Simulation
Drilling simulation technology offers a risk-free platform to train personnel and analyze various scenarios. These simulations provide realistic, immersive environments for drillers to practice and refine their skills, allowing them to tackle complex scenarios with confidence.

To sum up, each drilling method in the oil and gas industry has distinct advantages and limitations, making it essential to choose the most appropriate one based on the specific characteristics of the reservoir, operational goals, and budgetary constraints. Vertical drilling remains a practical choice for shallow and easily accessible reservoirs, while directional and horizontal drilling expand the range of accessible resources and improve yield in larger fields. Rotary steerable drilling offers unmatched control and efficiency, especially for complex or deepwater projects. By selecting the best-suited drilling technique, operators can maximize productivity, reduce costs, and achieve higher environmental stewardship.
Marine navigation lights are essential safety components on vessels, used to signal position, direction, and type of operation to other boats. The development of a double-deck design in marine navigation lights marks a significant advancement, aiming to improve both functionality and durability in these critical components. This article explores the benefits, engineering principles, and applications of double-deck design in marine navigation lights.

The Purpose and Importance of Marine Navigation Lights
Marine navigation lights help ensure safe passage, particularly in low-visibility conditions such as nighttime, fog, or storms. These lights vary in color, placement, and operational patterns to indicate a vessel’s size, position, and movement. As a vital part of maritime safety, marine navigation lights are regulated by international standards like the International Regulations for Preventing Collisions at Sea (COLREGs).
Introduction to Double-Deck Design in Marine Navigation Lights
Double-deck marine navigation lights feature a dual-tiered structure, with two separate light chambers (or decks) within a single housing unit. Each deck typically serves a specific function, such as displaying different colors or intensities, allowing for increased flexibility in signaling.
Key Elements of Double-Deck Design:
Two-tiered Light Chambers: Each deck operates independently, allowing the same fixture to emit distinct lights or patterns from each chamber.
Increased Lighting Surface: Doubling the lighting area enhances visibility, making signals more noticeable over greater distances.
Durability and Redundancy: A double-deck design provides redundancy, where if one chamber fails, the other remains operational, increasing safety.

Advantages of Double-Deck Design in Marine Navigation Lights
The double-deck design offers several advantages that improve visibility, safety, and operational efficiency:
1. Enhanced Visibility
The dual-chamber design allows for a larger light-emitting area, making the lights brighter and more easily seen from afar.
Improved visibility aids in faster recognition of a vessel’s position and direction by other vessels, reducing the likelihood of collisions, especially in crowded or busy maritime areas.
2. Redundant Safety Mechanism
By incorporating two independent light sources, the double-deck design creates a fail-safe system. If one deck malfunctions, the second can still operate, preventing total light failure.
This redundancy is particularly valuable for vessels operating in remote or challenging environments, where maintenance opportunities may be limited.
3. Operational Versatility
Double-deck lights can accommodate different lighting configurations, allowing for greater versatility. For instance, one deck can emit a steady light while the other flashes, or each deck may be a different color, such as green and red, for port and starboard lights.
This adaptability is ideal for vessels with varying operational requirements or those navigating diverse waterways.
4. Improved Durability and Weather Resistance
Double-deck marine navigation lights are typically designed with enhanced structural integrity to withstand harsh maritime environments. The sealed dual-chamber structure minimizes exposure to moisture, salt, and impact, reducing wear and tear.
The robust construction of double-deck lights makes them highly resilient against environmental factors, ensuring longevity and consistent performance.
5. Technical Aspects of Double-Deck Marine Navigation Lights
The engineering of double-deck navigation lights incorporates specialized materials, optics, and power management to ensure efficiency and reliability.
Materials and Sealing Technology
Double-deck lights are often crafted from marine-grade materials like stainless steel and polycarbonate, offering superior corrosion resistance.
Advanced sealing techniques prevent water ingress and withstand high-pressure cleaning or wave impact, essential for enduring marine conditions.
Optical Design and LED Technology
LEDs are the preferred light source in double-deck navigation lights, providing higher brightness, lower energy consumption, and longer life than traditional bulbs.
Optical lenses are strategically placed in each deck to maximize light dispersion, making signals more conspicuous in a range of visibility conditions.
Power Efficiency and Backup
Double-deck designs often include low-power LED systems that draw minimal energy, essential for vessels relying on limited battery or solar power.
Many models incorporate backup power solutions, like solar charging or batteries, to ensure continuous light output during prolonged operations.
5. Applications of Double-Deck Marine Navigation Lights
Double-deck navigation lights are particularly beneficial for a variety of maritime applications:
1. Commercial Shipping
Larger vessels require enhanced lighting to ensure visibility across vast distances. Double-deck lights provide a reliable solution for commercial shipping vessels that operate continuously, often through the night and in harsh conditions.
2. Offshore Oil and Gas Platforms
Double-deck lights are valuable for marking boundaries and providing clear signals in oil and gas operations. The redundancy in lighting ensures that platforms remain visible to passing vessels, reducing the risk of collisions.
3. Recreational and Fishing Boats
Smaller vessels, including recreational boats and fishing vessels, benefit from the compact yet powerful design of double-deck lights. These lights provide increased visibility without requiring significant power, making them ideal for smaller energy systems.
4. Maritime Search and Rescue Operations
Double-deck lights provide reliable, highly visible signals for search and rescue operations, even in challenging weather conditions. The dual-chamber design can signal distress effectively, helping rescuers locate vessels quickly.

Future Trends in Double-Deck Marine Navigation Lights
Innovation in double-deck navigation lights continues, with promising trends emerging:
IoT-Connected Lights: Integrating IoT capabilities into double-deck lights enables remote monitoring and control, allowing operators to detect malfunctions and manage light settings in real-time.
Solar Integration: Solar-powered double-deck lights are becoming increasingly common, providing sustainable energy options that reduce reliance on the vessel’s power systems.
Advanced Optics for Increased Range: Enhanced optics and lens technology are being developed to further increase the visible range of double-deck lights, making signals clearer at extended distances.
In summary, the double-deck design in marine navigation lights represents a significant advancement in maritime safety and signaling. By enhancing visibility, providing operational redundancy, and offering flexible lighting configurations, double-deck lights cater to the diverse needs of vessels across commercial, recreational, and industrial maritime sectors. As technology continues to evolve, double-deck lights will likely become a staple in modern navigation systems, ensuring that vessels remain visible and safe in all maritime conditions.
Carriage bolts are a distinctive type of fastener with a round, domed head and a square neck that prevents rotation during installation. Originally designed for use in wooden applications, they have expanded into a variety of materials and industries thanks to their durability and versatility. This article explores what carriage bolts are, how they work, and the most common applications for which they are ideally suited.

1. Understanding Carriage Bolts
Carriage bolts feature a smooth, rounded head with no slots or ridges. Directly beneath the head, a square section bites into the material, preventing the bolt from turning when a nut is tightened onto it. Typically, carriage bolts are installed with the head facing outward, creating a neat, tamper-resistant finish. This makes them especially valuable in projects where aesthetics and safety are priorities.
2. How Carriage Bolts Work
Carriage bolts function by inserting the bolt through a pre-drilled hole, allowing the square neck to engage with the material. Once a nut is applied to the threaded end, it is tightened with a wrench or spanner, drawing the materials together. The unique design prevents the bolt from rotating, providing a secure, long-lasting bond even in demanding environments.
3. Key Applications of Carriage Bolts
Carriage bolts are used in a broad range of applications. Here’s a look at some of the most common uses:
A. Woodworking and Furniture Assembly
Carriage bolts are commonly used in woodworking and furniture projects due to their secure, tamper-resistant design. The smooth, rounded head makes them ideal for surfaces that will be touched or leaned against, ensuring comfort and safety. Examples include:
Assembling outdoor decks and benches
Constructing playground equipment
Securing wooden structures, such as fences and gates
B. Automotive and Construction Industries
In automotive and construction settings, carriage bolts are valued for their strength and reliability. They are used in:
Securing wooden components in trailers and flatbeds
Fixing parts in construction frameworks where aesthetics and durability are needed
Reinforcing wooden panels or boards that may face heavy wear and tear
C. Metalworking and Heavy Equipment
Although carriage bolts are traditionally associated with wood, they are also used in metal applications, particularly when paired with specialized washers. The square neck of the bolt provides stability and prevents movement in metal-to-metal connections, which is useful for:
Securing metal sheeting or panels
Attaching machinery parts in equipment that experiences vibration
Reinforcing structures where shear strength is necessary
D. Home Improvement Projects
Carriage bolts are popular in home improvement and DIY projects due to their ease of use and strong, secure connection. Common household applications include:
Fixing wooden or metal doors
Creating garden structures, such as pergolas and arbors
Building custom furniture pieces, like beds or cabinets
E. Marine and Outdoor Structures
Carriage bolts, especially when made of stainless steel or coated in corrosion-resistant materials, are well-suited for outdoor and marine environments where exposure to moisture and weather is constant. Common uses in this category include:
Securing dock structures and boat fittings
Assembling outdoor recreational structures, like picnic tables and beach benches
Constructing sheds, pergolas, or outdoor storage units
4. Why Choose Carriage Bolts?
Carriage bolts have distinct benefits that make them a popular choice across different applications:
Tamper Resistance: With a rounded head and lack of slots, carriage bolts are difficult to remove without specialized tools, adding a level of security.
Aesthetic Appeal: The smooth, rounded head gives a clean look, especially important in furniture and visible structural applications.
Ease of Installation: Thanks to the square neck, carriage bolts require minimal effort to keep in place while tightening, especially in wood.
Strength and Durability: Made from high-quality materials like stainless steel, carriage bolts can withstand high loads and environmental stresses.
5. Types of Carriage Bolts
Carriage bolts come in several materials and finishes to suit different applications:
Stainless Steel: Provides excellent corrosion resistance for outdoor and marine use.
Zinc-Plated Steel: Ideal for indoor use, offering moderate corrosion resistance.
Galvanized Steel: Galvanized carriage bolts are suitable for outdoor projects, with a corrosion-resistant coating.
Black Oxide Coated: Offers a more aesthetic finish for furniture and visible applications.

6. Installation Tips for Carriage Bolts
Drill the Hole Slightly Smaller Than the Square Neck: This ensures a snug fit that prevents the bolt from turning during installation.
Use a Hammer to Tap the Bolt in Place (If Needed): Especially in dense wood, gently tapping the bolt will help secure the square neck in the material.
Apply a Washer for a Tightened Fit: A washer helps distribute pressure and prevent damage to the material.
Conclusion
Carriage bolts are an essential fastener with applications across woodworking, metalworking, automotive, and marine industries. Their tamper-resistant, aesthetically pleasing design, combined with their strength and versatility, makes them an ideal choice for a wide range of projects. Whether securing wood in outdoor structures, assembling furniture, or reinforcing metal frameworks, carriage bolts provide reliable, long-lasting connections that are easy to install and difficult to loosen.
Have you ever wondered how scientists measure a fluid’s thickness or its resistance to flow? Viscosity is a critical property in many industries, impacting product quality, process efficiency, and even consumer satisfaction. To accurately measure viscosity, viscometers play an essential role. Among the various viscometry methods, digital rotational viscometers are particularly valued for their precision, efficiency, and user-friendliness. This article explores the fundamentals and benefits of digital rotational viscometry, why it's preferred across industries, and how it operates.

What is Viscosity?
Viscosity represents a fluid's resistance to flow. High-viscosity fluids, like honey or molasses, flow slowly, while low-viscosity fluids, such as water, flow easily. Understanding viscosity is vital across industries—from pharmaceuticals to food processing—since it influences everything from manufacturing processes to product consistency.
Traditional Methods in Viscometry
Capillary Viscometry: Measures fluid flow through a narrow tube. However, its sensitivity to temperature changes limits its effectiveness.
Rotational Viscometry: Relies on a rotating spindle in a fluid but requires manual operation, which can reduce accuracy.
Falling Ball Viscometry: Determines viscosity by observing how fast a ball falls through the fluid, though it is limited to transparent fluids and can suffer from turbulence errors.
Vibrational Viscometry: Involves damping oscillations in a vibrating probe. However, this method requires precise calibration and may be influenced by external vibrations.
While these methods have their advantages, they often fall short in accuracy, versatility, and ease of use. Digital rotational viscometers address these limitations with automated operation, real-time data analysis, and higher precision.

Advantages of Digital Rotational Viscometry
Digital rotational viscometers offer several key benefits:
Precision and Accuracy: Automated operation reduces human error, providing reliable data for research, quality control, and process optimization.
Efficiency and Automation: Automated functions streamline the measurement process, allowing users to set parameters, initiate measurements, and obtain results quickly.
Versatility: Digital rotational viscometers handle a broad range of viscosities and can analyze both Newtonian and non-Newtonian fluids, making them versatile for various industries.
Real-Time Data Analysis: Built-in software enables real-time monitoring of viscosity changes, helping users analyze trends and make prompt decisions.
Cost-Effectiveness: While the initial cost may be higher, the long-term savings in maintenance and reduced manual labor make these viscometers a cost-efficient solution.
Compliance with Standards: These instruments often meet industry standards, simplifying regulatory audits and supporting consistent product quality.
Components of a Digital Rotational Viscometer System
Rotating Spindle: Applies shear stress to the fluid, with spindle types varying based on sample characteristics.
Torque Sensor: Measures the torque exerted by the fluid, which is crucial for determining viscosity.
Drive System: Controls the spindle’s rotation speed, allowing precise adjustments for different sample viscosities.
Temperature Control: Maintains a stable temperature for accurate readings, as viscosity can vary with temperature changes.
Display and Interface: Allows users to set parameters, initiate measurements, and visualize data.
Software: Enables data analysis, plotting of viscosity curves, and easy data export.
Sample Chamber: Holds the fluid sample and accommodates different spindles for varied viscosities.
Optional Accessories: Enhance functionality with items like temperature probes and sample holders.
Together, these components enable precise and efficient viscosity measurements, making digital rotational viscometers invaluable for both industrial and scientific applications.
How Digital Rotational Viscometers Operate
Digital rotational viscometers function based on the principles of shear stress, shear rate, and viscosity measurement:
Shear Stress and Shear Rate: Shear stress is the force exerted on a fluid, while shear rate is how fast the fluid layers move relative to each other.
Viscosity Measurement: The torque sensor quantifies resistance as the spindle rotates within the sample, which corresponds to the fluid’s viscosity.
Newton’s Law of Viscosity: This law states that shear stress is directly proportional to the product of viscosity and shear rate.
Calibration and Conversion: Calibration with standard fluids enables the viscometer to convert torque readings into viscosity values accurately.
Real-Time Analysis: With digital displays and software, users can monitor and analyze viscosity in real-time, enhancing process control.
By adhering to these principles, digital rotational viscometers deliver highly accurate and consistent viscosity data, essential for many applications.

Safety Guidelines for Operating Digital Rotational Viscometers
Read the Manual: Familiarize yourself with the manufacturer’s instructions and safety guidelines.
Personal Protective Equipment (PPE): Use goggles and gloves to prevent contact with potentially hazardous samples.
Proper Setup: Place the viscometer on a stable surface and ensure all connections are secure.
Sample Handling: Avoid overfilling to prevent spillage and potential contamination.
Temperature Control: Follow temperature guidelines to avoid measurement errors and protect equipment.
Spindle Installation and Removal: Handle carefully to avoid misalignment or equipment damage.
Power Safety: Only use the specified power sources and avoid damaged cords.
Cleaning and Maintenance: Regular cleaning prevents sample buildup and ensures measurement accuracy.
Emergency Procedures: Know the location of emergency shut-off buttons and have spill cleanup materials on hand.
Training and Supervision: Ensure operators are trained in safe handling, operation, and maintenance.
Following these safety protocols minimizes risk and ensures optimal performance when using digital rotational viscometers.
Digital rotational viscometers represent a substantial advancement in viscosity measurement, combining accuracy, efficiency, and versatility. By using the principles of shear stress and shear rate, these tools deliver real-time data for diverse industries. With their automated features and reliable performance, digital rotational viscometers are essential for applications in research, development, and quality control. For those looking for high-quality digital rotational viscometers, Drawell provides a trusted range of lab equipment to meet your needs.
Creating a custom My Little Pony custom plush can be a fun and rewarding project for fans of all ages! Whether you're crafting a plush of a classic character or designing a new pony from scratch, the following guide will help you turn your ideas into a soft, cuddly, and colorful plush.

1. Gather Your Materials
To start, you’ll need the following materials and tools:
Pattern: Look for a My Little Pony plush pattern online or draw your own. Patterns can be purchased or found free on various crafting websites. Many patterns come with instructions for cutting and sewing.
Fabric: Select a soft fabric like fleece, minky, or felt in the colors needed for your pony. Minky fabric, while slightly more challenging to sew, offers a luxurious, soft feel ideal for custom plush toys.
Thread: Choose thread colors that match your fabric to ensure seams blend in seamlessly.
Polyester Stuffing: This is the fluffy filling that gives your plush its shape. Polyester fiberfill or cotton batting are commonly used.
Scissors, Pins, and Sewing Needles: For cutting and assembling your pieces.
Sewing Machine (optional): A machine can help with quicker stitching, but you can sew by hand if preferred.
Markers or Embroidery Supplies: For adding facial features, cutie marks, and other small details.
2. Choose Your Character and Design
If you’re recreating a well-known character like Twilight Sparkle or Rainbow Dash, find reference images to match colors, hairstyle, and details accurately. If creating an original character, sketch out your pony to decide on colors, hair style, eye shape, and any distinguishing features, like a unique cutie mark.
3. Prepare the Pattern and Fabric
Cut Out the Pattern Pieces: Follow the pattern’s instructions, cutting out each piece precisely.
Trace Onto Fabric: Use your pattern pieces to trace onto the fabric, making sure to flip any pieces that need to be mirrored (like legs or ears).
Cut the Fabric Pieces: Carefully cut each piece out, being mindful to leave extra fabric for seams if the pattern specifies.
4. Sewing the Main Body
Begin with the Legs and Body: Start by stitching the legs, arms, and body as indicated by the pattern. Sew pieces inside out, leaving a small opening to turn the fabric right-side out.
Attach the Head: Sew the head pieces together and then attach it to the body. This may be the trickiest part, so use pins to hold the fabric in place as you sew.
Turn and Stuff: Turn the sewn pieces right-side out and begin stuffing them with polyester filling. Aim for an even, plush feel but avoid overstuffing, which can make seams pop open.
5. Adding the Mane, Tail, and Ears
Mane and Tail: Cut the fabric for the mane and tail based on the character design. Sew or glue these parts onto the head and rear of the plush.
Ears: Sew the ears to the top of the head, matching the colors and positioning according to your reference images.

6. Details: Face, Cutie Mark, and Accessories
Face: Sew or embroider the eyes and mouth. For characters with detailed eyes, consider using fabric markers or fabric paint to achieve the right look.
Cutie Mark: Draw, embroider, or sew on the cutie mark. Some choose to use iron-on fabric transfers for highly detailed designs.
Accessories: If your pony has any accessories (like glasses, a crown, or wings), sew these on or secure them with fabric glue.
7. Final Assembly and Quality Check
Once all parts are attached, give your plush a final check. Ensure all seams are secure, and make any final adjustments.
Lightly brush the plush with a soft-bristled brush if using minky fabric to fluff up the fibers.
8. Personalize Your Pony!
Add any additional finishing touches to personalize your custom My Little Pony plush further. This might include sparkles, small sewn-in jewelry, or a felt scarf.
By following these steps, you’ll have a custom My Little Pony plush that’s unique, adorable, and perfect for fans of the series. Crafting a custom plush can be a time-intensive process, but with patience and a creative eye, you’ll have a wonderful handmade pony to treasure or gift.